Table of Contents
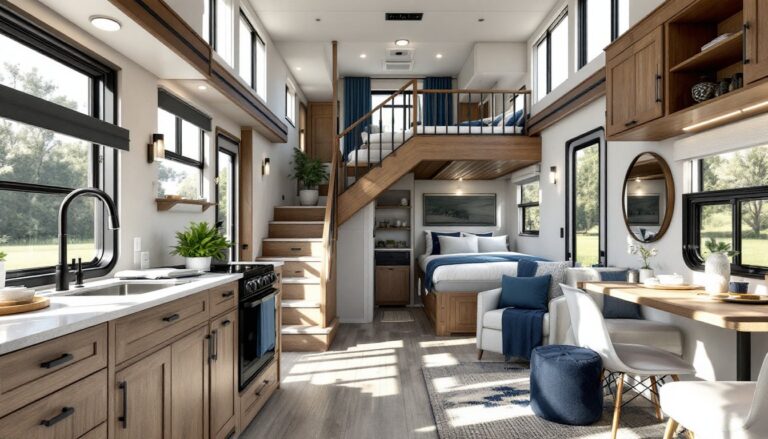
ToggleBuilding or customizing a luxury 3-bedroom, 2-story RV interior demands a different approach than traditional home design. Space constraints, weight distribution, and mobile living realities push designers to think vertically and functionally without sacrificing comfort or aesthetics. Whether you’re retrofitting an existing Class A motorhome or constructing a high-end travel trailer, understanding layout optimization, material selection, and smart bedroom design will transform a metal box into a sophisticated retreat on wheels. This guide walks you through the critical decisions that separate cramped quarters from genuinely livable luxury.
Key Takeaways
- Luxury 3-bedroom, 2-story RV interior design prioritizes vertical space planning and smart layout optimization to transform 300–450 square feet into a genuinely livable retreat without sacrificing comfort or aesthetics.
- Marine-grade plywood cabinetry, luxury vinyl plank flooring with thick wear layers, and non-porous countertops are essential materials that withstand constant vibration, temperature swings, and moisture in mobile living environments.
- Creating visual separation between levels through varied ceiling heights, strategic staircase design, and layered lighting—bright task lighting downstairs and softer ambient lighting upstairs—prevents the space from feeling cramped.
- Master bedroom comfort in a luxury RV depends on secure bed frames bolted to floor studs, blackout thermal shades, built-in storage, and moisture barriers that protect against water damage and mold growth.
- Layered LED lighting combining overhead fixtures, task lighting, and accent strips transforms small spaces while a deliberate neutral color palette with one accent color creates sophistication without visual clutter.
- Quality textiles, personalized touches like upholstered headboards, wall-mounted reading lights, USB ports, and minimal, multipurpose accessories elevate secondary bedrooms from utilitarian bunks into premium sleeping quarters.
Space Planning and Layout Optimization
Luxury RV interiors live or die by their layout. With 3 bedrooms across 2 stories, you’re working with roughly 300–450 square feet of interior space, a footprint equivalent to a small apartment. The key is eliminating wasted circulation space and ensuring each zone serves multiple purposes.
Start by mapping your floor plan on paper or using design software. Identify load-bearing walls and structural supports (frame rails, sidewall studs) before moving anything. In a travel trailer or motorhome, these aren’t negotiable, removing or relocating them compromises safety and resale value. The lower level typically handles living, dining, and a master suite: the upper level sleeps two to three in smaller bedrooms or a sleeping loft.
Consider traffic flow paths. The tightest RVs force people to squeeze sideways: better layouts let you move from the entrance, through living space, to the galley, and back to bedrooms without bottlenecking. If your RV has an awkward mid-wall closet or structural pillar, work around it rather than against it. A well-placed accent wall or open shelving unit can make obstructions disappear visually.
Creating Visual Separation Between Levels
Visual separation prevents the upper level from feeling like a sleeping loft crammed above the living room. Use varied ceiling heights, partial walls, or subtle level changes to define zones. A half-height partition wall (roughly 4–5 feet tall) between the main living area and loft entrance creates a psychological boundary without blocking sightlines or trapping heat.
Staircase design matters hugely. Narrow, steep stairs are compact but exhausting: a gently sloped staircase with wider treads (10–11 inches deep, 7–8 inches rise) costs more length but feels safer and more premium. If space is genuinely tight, a ship’s ladder or alternating-tread staircase offers a middle ground. Handrails and nosing (the edge that overhangs each tread) aren’t optional, they’re safety requirements and accessibility essentials.
Lighting is your secret weapon for visual separation. Brighter task lighting in the galley and downstairs living areas contrasts with softer ambient lighting in the upper bedrooms, signaling different zones. Under-stair accent lighting adds sophistication while subtly defining the transition between levels.
Premium Material Selection for Durability and Style
In an RV, materials work harder than they do in a stationary home. Vibration, temperature swings, moisture, and foot traffic are unrelenting. Cheap plywood delaminating or particle board sagging isn’t just ugly, it’s a structural failure waiting to happen.
Flooring, Cabinetry, and Finishes
Flooring sets the tone and endures constant impact. Luxury vinyl plank (LVP) with a cork or felt backing absorbs vibration, resists moisture, and mimics real wood or stone convincingly. Avoid thin, glue-down vinyl: it telegraphs every footstep and tears under shifting load. LVP with a 0.080-inch wear layer lasts through years of camping. Sealed hardwood or bamboo works if you’re willing to refinish periodically and accept that humidity fluctuations will cause minor movement.
Cabinetry is your largest material investment. Use marine-grade plywood (Okume or Birch) with real-wood veneers, not MDF wrapped in plastic laminate, MDF swells when damp, and plastic peels in the heat. Cabinet boxes should be half-inch plywood minimum: thinner stock deflects under load. Soft-close hinges and drawer glides (Blum or Grass Hardware are standard in luxury RVs) prevent slamming and wear. Countertops should be non-porous quartz or solid-surface material like Corian: laminate degrades when moisture seeps through seams.
Finishes matter for cohesion. Choose a consistent color palette, warm whites and grays feel spacious, while warm wood tones add richness without visual clutter. Matte or satin lacquer over veneered cabinetry looks far better than high-gloss, which shows fingerprints and dust constantly. Paint walls in light, slightly warm neutrals (off-white, pale gray) to maximize perceived space. Accent walls are tempting but risky in small spaces: save them for smaller surfaces like a headboard wall or corner nook.
Wall construction affects both durability and finished appearance. Standard RV walls are 1-inch-thick aluminum frame with insulation, drywall, and vinyl wallcovering. Luxury interiors often use thin plywood or hardboard skins instead of vinyl for a more finished, less “campy” look. Wallcovering should be marine-grade, mold-resistant, and applied over a moisture barrier. Fresh paint, high-quality RV-specific paint formulated for flexibility and moisture resistance, is often preferable to wallpaper in high-traffic areas.
Bedroom Design and Comfort Features
Bedrooms in a luxury RV aren’t afterthoughts, they’re sanctuaries. Comfortable sleeping quarters separate good RVs from truly livable ones.
Master Suite and Secondary Bedrooms
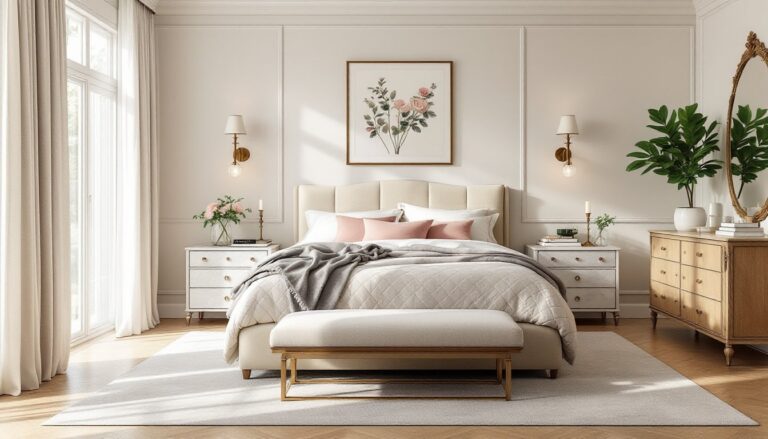
The master suite typically occupies the lower level’s rear, claiming the largest contiguous floor space (often 10×12 to 12×14 feet). A full queen or king bed is achievable: many luxury RVs offer memory-foam mattresses with moisture-wicking toppers and premium bedding to justify the “luxury” label. Ensure the bed frame is bolted to floor studs, movement during driving is unsettling and unsafe. Windows on two walls (if possible) prevent the master from feeling like a cave, and blackout shades with thermal backing control light and heat.
Storage is critical. Built-in wardrobes under or beside the bed maximize use of vertical walls. Drawers are preferable to cabinets with swing-out doors in moving vehicles: every swinging surface is a pinch point. Ventilation, a small exhaust fan or operable window, prevents humidity buildup that fosters mold. A moisture barrier behind cabinetry and under the mattress frame is non-negotiable in luxury RVs: water damage spreads fast and ruins resale value.
Secondary bedrooms upstairs are typically smaller (6×10 to 7×12 feet), accommodating twin or full-size bunks or a single full bed. Twin bunks are classic for reason, they’re space-efficient, easy to enter, and isolate sleepers from each other. Bunk railings and a secure ladder prevent injuries during driving or rough terrain. For a single-bed loft above a garage or dinette, ensure headroom clearance of at least 3 feet when sitting upright. Underutilized overhead space is wasted luxury.
Personal touches make bedrooms feel premium rather than utilitarian. Fabric headboards (upholstered panels bolted behind the bed) add warmth and soundproofing. Wall-mounted reading lights and USB charging ports embedded in cabinetry address real-world comfort. Layered bedding, a quality mattress pad, fitted sheet, flat sheet, lightweight duvet, and throw blanket, accommodates temperature swings as you travel between climates. Experts at Apartment Therapy and Real Simple consistently emphasize that bedroom comfort hinges on textiles and personalization, principles that apply tenfold in compact spaces. Consider adding closet organizers, hanging storage pockets, and dedicated shelving for pillows and seasonal clothing to maximize functionality without adding bulk.
Lighting, Color Palettes, and Aesthetic Appeal
Lighting in a luxury RV serves double duty: it creates ambiance and solves practical visibility problems inherent to small spaces with limited windows.
Layered lighting is essential. Overhead ceiling fixtures (dimmable LED modules rated for 12V DC in motorhomes, or standard 110V in travel trailers plugged into shore power) provide general illumination. Task lighting, under-cabinet strips in the galley, sconces flanking the master bed, reading lights in secondary bedrooms, makes spaces functional and intimate. Accent lighting (LED strip under stair treads, behind floating shelves, or around window reveals) adds visual depth without overhead glare. LED technology is mandatory: incandescent or fluorescent bulbs generate heat, consume power, and burn out constantly.
Color palettes should feel deliberate, not accidental. A primary neutral (warm white, soft gray, or light taupe) paired with one accent color (navy, forest green, warm gold) creates sophistication without visual chaos. Use the accent sparingly, a throw pillow, a wall art piece, cabinetry hardware, rather than painting multiple walls. Natural materials (light wood trim, stone-look countertops, linen upholstery) add warmth that pure whites and grays lack.
Window treatments must balance aesthetics with function. Roller shades in a neutral fabric (motorized, if the RV has 110V power) feel tailored and operate quietly. Add lightweight curtains in a coordinating fabric for softness and light diffusion. Thermal blackout linings reduce heat gain and cold loss, critical when parked in direct sun or winter climates. HGTV showcases numerous design principles around creating cohesive, multi-sensory spaces: small RV interiors benefit from the same intentionality, just in miniature.
Accessories should be minimal and multipurpose. A mirror opposite a window bounces light: wall-mounted shelving displays books or personal items without consuming floor area. Area rugs define zones, add warmth underfoot, and muffle sound in otherwise hard-surfaced interiors. Artwork and soft furnishings (throw blankets, pillows) humanize the space and reflect the owner’s taste. Avoid plastic organizers, generic décor, or overwrought furnishings, they cheapen the environment instantly. A few well-chosen pieces beat a cottage full of clutter.
Temperature and humidity control reinforce aesthetic perception. A quiet, well-functioning HVAC system (mini-split heat pump for high-end rigs, standard rooftop AC for motorhomes) keeps comfort stable and prevents mold or condensation issues that damage interiors visually and structurally. Smart thermostat integration and ventilation fans that run automatically in high-moisture areas (galley, bathrooms) are worth the investment.