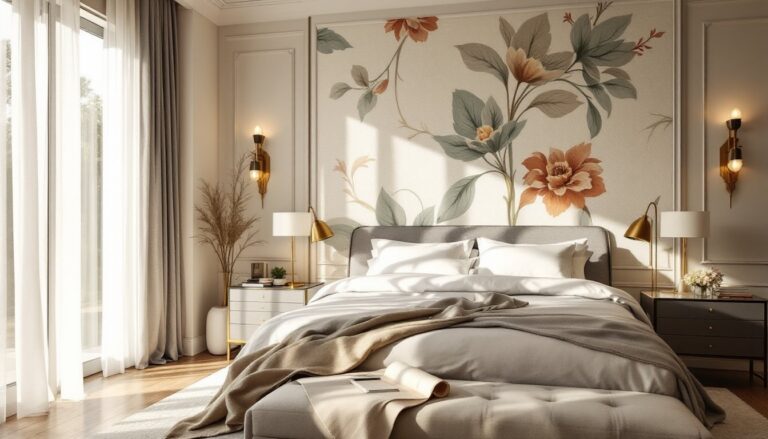
Table of Contents
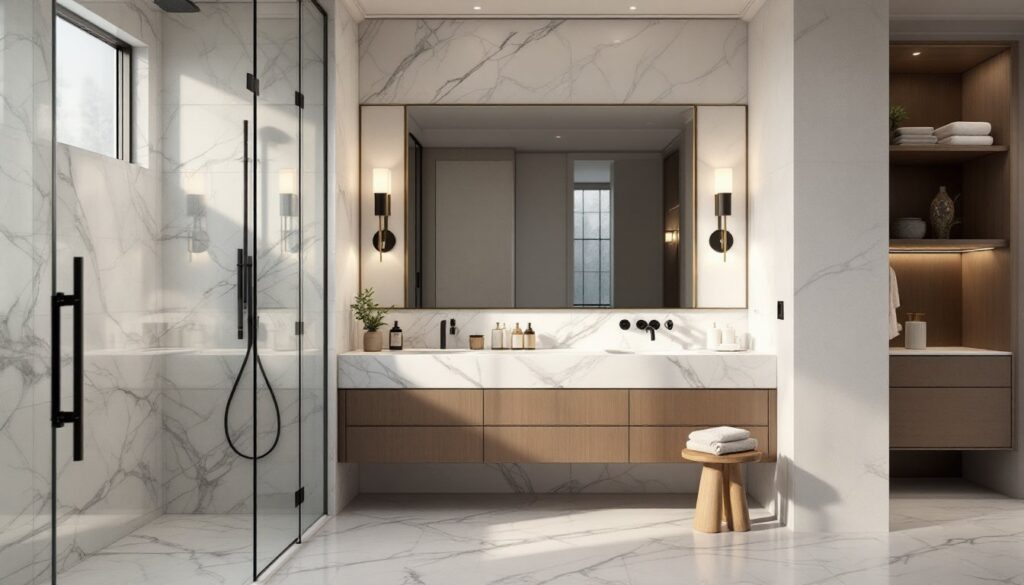
ToggleA luxury marble bathroom elevates a home in ways few other renovations can match. Marble, whether Carrara, Calacatta, or a deeper stone like Nero Marquina, signals sophistication and permanence while offering genuine durability when chosen and installed thoughtfully. Building a marble bathroom isn’t just about slapping white tile on the walls: it’s about understanding stone types, layout strategy, and the practical demands of moisture-rich environments. This guide walks you through selecting marble that suits your home, planning a functional layout, and executing a design that balances aesthetic ambition with real-world maintenance.
Key Takeaways
- Carrara and Calacatta marble offer luxury appeal at different price points, with Carrara starting at $3–$8 per square foot for budget-conscious buyers and Calacatta delivering bolder veining at $8–$15 per square foot.
- Honed and tumbled finishes provide better slip resistance and mask watermarks better than polished marble, making them safer and more practical choices for bathroom floors and wet areas.
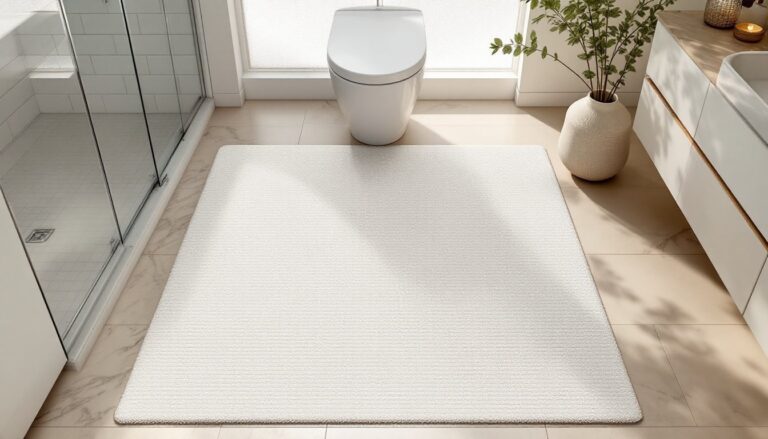
- A luxury marble bathroom works best as a cohesive design when marble anchors one or two key features (like a shower surround or vanity wall) rather than covering every surface, especially in smaller bathrooms under 50 square feet.
- Proper substrate preparation, including cement backer board in wet zones and a solid, flat subfloor, is essential to prevent cracking on marble—work that typically requires a professional stone installer experienced with natural materials.
- Daily maintenance using only pH-neutral cleaners and immediate blotting of acidic spills prevents etching and mineral deposits, allowing homeowners to enjoy marble bathrooms for decades with practical, respectful care rather than obsessive upkeep.
Selecting The Right Marble For Your Bathroom
Popular Marble Types And Their Durability
Carrara marble tops the list for budget-conscious luxury bathrooms. It’s quarried in Italy, features soft whites and light grays, and costs $3–$8 per square foot in tile form. Calacatta is pricier ($8–$15 per square foot) but delivers bolder veining and whiter backgrounds that feel more dramatic.
Nero Marquina and other dark marbles introduce visual weight and sophistication: they hide water spots better than light stones but require regular sealing. Marble’s Mohs hardness rating is 3–4, making it softer than granite (8) or quartz (7). In bathrooms, this matters: high-traffic floor areas benefit from honed or tumbled finishes that mask scratches, while walls can handle polished looks without functional compromise.
Consider your water hardness and cleaning habits when selecting. Hard water leaves mineral deposits on polished marble: if you’re committed to weekly vinegar rinses, polished marble works. If you prefer a lower-maintenance approach, honed finishes are more forgiving. Many homeowners underestimate how often bathroom marble requires resealing, typically every 1–3 years depending on traffic. Check whether the stone is acidic-sensitive: Carrara and Calacatta etch when exposed to lemon juice or vinegar, meaning you’ll see dull spots. Some view this as patina: others find it maddening.
Marble Finishes And Aesthetic Appeal
Polished marble gleams and feels smooth to the touch but becomes slippery when wet, a serious safety and slip-liability issue in bathrooms. Honed marble is matte, less slippery, and hides watermarks better. Tumbled finishes (softer, more textured edges) feel artisanal and work well on accent walls or shower surrounds where slip resistance matters less.
Leathered finishes, a trendy 2026 choice, combine the look of honed with light texture, offering a contemporary feel without the full-slip risk of polished marble. If you’re installing marble on bathroom floors, a honed or textured finish is safer and more practical than polished. Design-wise, lighter marbles open up tight bathrooms and pair well with gold or brass hardware for a refined look. Darker stones create moody, spa-like atmospheres. Mix finishes thoughtfully: pairing polished marble wainscoting with honed floor tile creates visual hierarchy without looking jarring. Research inspiration from spaces that show how different finishes interact under real lighting before committing to 500 square feet of one texture.
Essential Layout And Space Planning Strategies
Bathroom marble works best when it anchors the design rather than overwhelming the space. If your bathroom is smaller than 40 square feet, feature one marble element, say, a floor-to-ceiling shower surround or an accent wall behind the vanity, rather than marbling every surface. This approach keeps costs reasonable (marble runs $15–$40 per square foot installed) and lets quality stone breathe visually.
Wall-mounted vanities with marble countertops create an open feeling, especially in bathrooms under 50 square feet. Recessed niches in shower walls reduce visual clutter while offering practical storage: these cost $200–$400 to frame and tile. When planning marble layout, account for grout lines. Larger format tiles (12″×24″ or larger) require fewer grout lines, creating a seamless, luxury feel, but demand perfectly flat substrate and skilled installation. Budget $8–$15 per square foot for labor on large-format marble tiles versus $5–$10 for standard 12″ tiles.
Consider sightlines: marble surfaces visible from the bathroom doorway or master bedroom set the tone for the entire bathroom. Place your highest-impact marble there, perhaps a statement shower wall with dramatic veining. Less visible areas (inside shower niches, low cabinet faces) are opportunities to use less-expensive marble varieties or blend marble with other materials. Many high-end bathrooms now pair marble (walls, vanity tops) with matte black tile, concrete accents, or stained wood cabinetry to avoid that “too matchy” feeling. This mixed-material approach is more forgiving of imperfect sealing practices because not every surface demands the same maintenance commitment.
Creating A Cohesive Design With Marble Features
A cohesive marble bathroom ties together material, hardware, lighting, and accessories through intentional repetition and contrast. Start by choosing your marble as the design anchor: the veining, color, and finish should inform everything else. If you’ve selected warm-toned Calacatta with subtle gold veining, brass or champagne-finish fixtures feel natural. Cooler grays pair better with polished chrome or matte black hardware.
Lighting dramatically affects how marble reads. Overhead lights can feel clinical: pair them with sconces flanking the vanity to create dimension. Warm LED (2700K) brings out warmth in stone and makes bathrooms feel inviting, while cool white (5000K) reads clinical. Many luxury bathrooms use dimmable warm lighting, allowing owners to adjust mood. Mirrors, especially large frameless or brass-framed pieces, bounce light and make marble shimmer without adding expense.
Textiles and accessories ground the space. Soft, natural linens and marble create a spa-like atmosphere: add a small wooden stool, ceramic soap dishes, or brass towel warmers to introduce tactile variety. Avoid bright, plasticky accessories: marble’s permanence and quiet luxury demand understated accompaniments. Wall-mounted shelving (floating or bracketed) in wood, stainless steel, or brass displays rolled towels and plants, breaking up marble expanses while keeping the space airy. Consider painting non-marble walls a soft, coordinating shade, warm whites, soft grays, or pale blues complement most marble types without competing. Research designer bathrooms on Elle Decor and Home Bunch for real examples of how finishes, colors, and materials work together in high-end settings.
Practical Installation And Maintenance Considerations
Marble requires substrate prep that many DIYers skip, causing problems. Bathroom subfloors must be solid, flat (within ¼” over 10 feet), and able to handle the weight, marble is heavy, roughly 175 pounds per 100 square feet of 1″ tile. If your subfloor is old or bouncy, reinforce it with additional plywood or cement board rated for wet environments. Walls need cement backer board, not drywall, in wet zones: the IRC (International Residential Code) mandates this within 24″ of water sources.
Large-format marble tiles and natural stone require thin-set mortar (not mastic), applied with a notched trowel in a full-coverage pattern. Small gaps mean flex, and flex causes cracking on a rigid material like marble. This work generally falls outside confident DIY territory: hire an installer experienced with natural stone. Expect $10–$25 per square foot in labor. Sealing happens after installation and grouting cure fully (typically 48–72 hours). Use a pH-neutral stone sealer appropriate to your marble type: Carrara and Calacatta benefit from annual resealing, while engineered stones like porcelain require less.
Daily maintenance is straightforward but non-negotiable. Use pH-neutral cleaners (avoid vinegar, lemon, or bleach). Dry marble after showers to prevent mineral deposits and water spots. Spills, especially acidic substances, should be blotted immediately: the longer an acidic liquid sits, the deeper the etch. Minor etches can be buffed out professionally, but prevention is cheaper than repairs. Don’t assume marble demands fussy upkeep: many homeowners live happily with marble bathrooms for decades by treating it like the practical, durable surface it is, with respect, not obsession. That said, if perfection matters to you, matte or honed finishes hide imperfections far better than polished, making long-term ownership less stressful. Explore real-world marble bathroom sourcing and inspiration to see how designers balance aesthetic ambition with livable maintenance.
Conclusion
A luxury marble bathroom becomes timeless when you choose stone suited to your home’s climate, lifestyle, and maintenance tolerance. Match finishes to function, plan layout intentionally, and don’t skimp on substrate prep or skilled installation. Marble’s permanence and beauty justify the investment, but only if expectations and reality align from the start. Start with one feature wall or floor, learn how marble behaves in your bathroom, then expand if it fits your life and vision. The result is a bathroom that doesn’t just look expensive: it feels intentional and thoughtfully designed.