Table of Contents
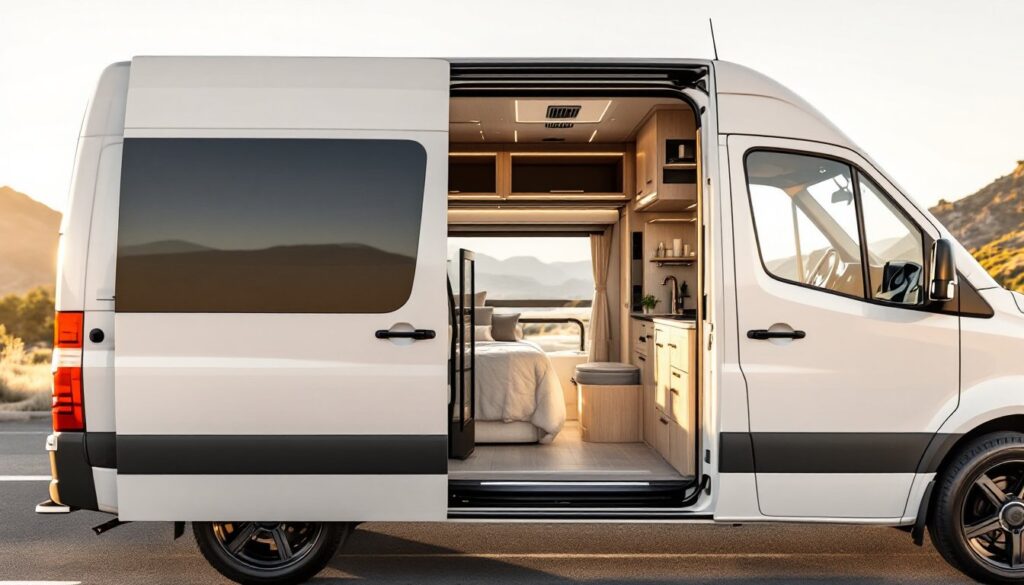
ToggleA fully equipped Sprinter van with a bedroom and bathroom isn’t just a vehicle, it’s a mobile lifestyle that combines luxury with practicality. Whether you’re planning weekend getaways, full-time van life, or extended travels, a bathroom luxury Sprinter van with bed offers the freedom to explore without sacrificing comfort. This guide walks you through the essentials of designing, installing, and finishing a compact RV build that feels spacious and functional, no matter how tight the quarters.
Key Takeaways
- A bathroom luxury Sprinter van with bed costs $40,000–$120,000 and offers better fuel economy, easier parking, and stealth-camping ability compared to traditional Class A motorhomes or RVs.
- Cassette or composting toilets with 5–7 gallon waste tanks paired with powered roof vents (minimum 400 CFM) are essential to prevent mold, odor, and moisture damage in your Sprinter van bathroom.
- Platform beds, rigid foam insulation (3–4 inches), thermal blackout curtains, and 12-volt LED lighting create a comfortable bedroom that maximizes space in 60–80 square feet without draining your electrical system.
- Vertical storage, PEX tubing plumbing, multi-functional furniture (dinette beds, fold-down tables), and sealed plywood over MDF materials ensure durability and efficient use of your 120–200 square foot interior.
- Real wood finishes, marine-grade flooring, performance upholstery, and layered LED lighting (strips, sconces, reading lamps) distinguish a luxury van build from basic conversions and make compact quarters feel like home.
Why Choose a Luxury Sprinter Van With Bedroom and Bathroom
A Sprinter van conversion offers advantages over traditional RVs and motorhomes. You get better fuel economy, easier parking in city environments, and the ability to stealth camp in regular parking lots, a legal gray area in many jurisdictions that motorhomes can’t exploit as easily.
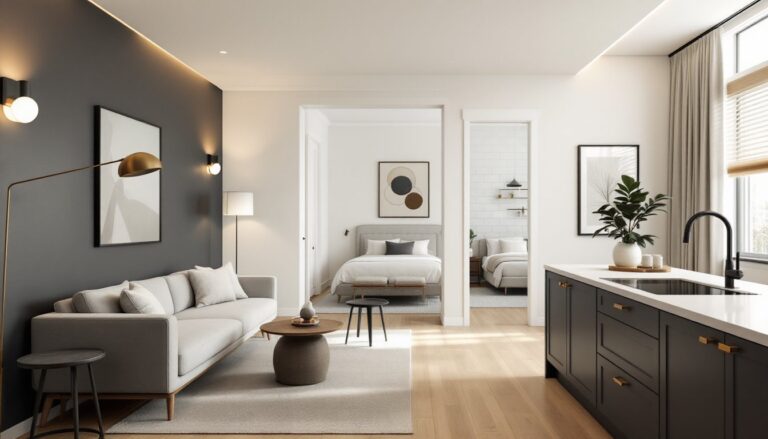
The combination of a bedroom and bathroom makes extended trips feasible without relying on campground facilities. You’ll wake up to your own shower, use a private toilet whenever needed, and sleep in a properly ventilated, temperature-controlled space. Unlike budget van builds that skimp on these essentials, a luxury approach means quality fixtures, thoughtful layout, and materials that hold up to constant use.
Sprinter vans (typically 144″ or 170″ wheelbase models) offer enough interior height, about 6’4″ in the high-roof variant, to stand upright and move comfortably. This matters more than you’d think when you’re living in 120–200 square feet for months at a time. The cost of a quality conversion ranges from $40,000 to $120,000 depending on finishes and custom work, but you’re investing in mobility without the depreciation hit of a $200,000+ Class A motorhome.
Essential Bathroom Features for Your Sprinter Van Build
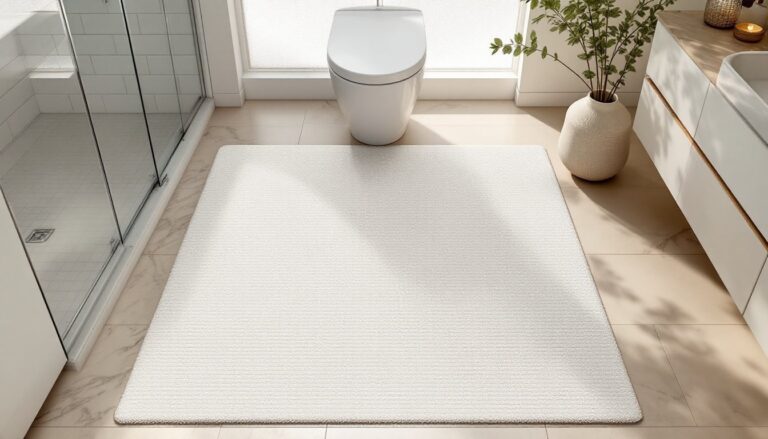
A van bathroom doesn’t need to feel cramped if you nail the layout and fixture selection. Most luxury builds dedicate 20–30 square feet to a bathroom, which is tight but workable with a corner toilet, compact sink, and shower enclosure that doubles as a changing area.
Compact Toilet and Waste Management Systems
Your toilet is the workhorse of van living, so don’t cheap out. A cassette toilet (like Dometic or Thetford models) is the standard for van builds. These detachable tanks slide out for easy emptying at RV parks or approved dump stations, keeping odor and maintenance hassles minimal. A composting toilet (Nature’s Head or similar) is another option if you’re off-grid often: they require no water hookup and minimal chemicals, though they demand regular attention.
Tank capacity matters. A 5–7 gallon fresh water tank and equivalent waste tank let you go 3–5 days between dumps for one person. Undersizing here leads to constant trips to dump stations. Mount the toilet over a holding tank beneath the van’s floor: this saves interior space and improves weight distribution.
Ventilation is non-negotiable. A roof vent with a powered fan (Maxxfan or similar) removes moisture and odor, preventing mold and mildew. Run it continuously when the toilet is used, and keep a window slightly cracked. Without proper air movement, a van bathroom becomes unbearable in humid climates within days.
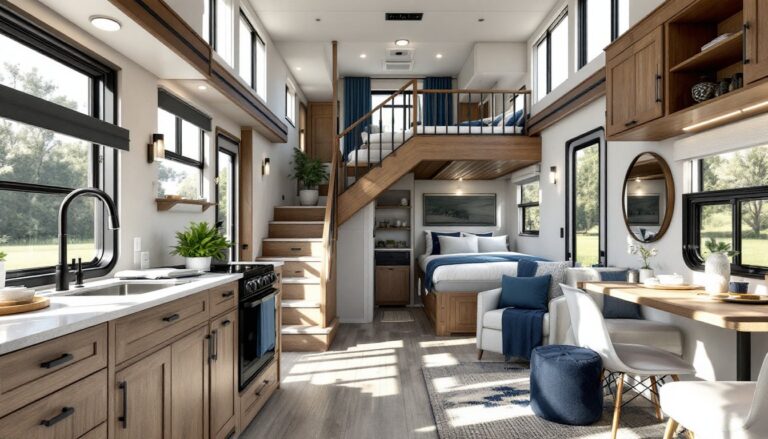
Designing a Functional Bedroom Space in Your Van
The bedroom is where comfort directly affects quality of life on the road. Most Sprinter builds place a queen or full bed across the back, which consumes about 60–80 square feet but leaves minimal walking space. A better approach for some: a 5-foot-wide platform bed (leaving a narrow aisle) or a murphy-style bed that folds up to create daytime living space.
Consider the bed’s construction. A solid plywood base with kiln-dried 2×4 framing prevents sagging and allows for storage drawers underneath. Soft-sided mattresses (like Nemo or IKEA foam) save weight compared to traditional coil springs: weight matters in a van since you’re working with a GVWR (Gross Vehicle Weight Rating) of around 10,000–12,000 lbs.
Insulation and climate control are critical. Use 3–4 inches of rigid foam insulation (XPS or PIR board) on walls and ceiling to keep the bedroom warm in winter and cool in summer. Add a quality thermal blackout curtain to control light and heat. A space heater (diesel or electric) and a small AC unit are luxuries that become necessities in extreme climates. Most van builds run 12-volt LED lighting with USB ports for device charging, avoid relying on overhead lights alone, which feel institutional and drain battery fast.
Smart Storage and Space-Saving Solutions
In 150 square feet, every inch counts. Vertical storage beats horizontal storage every time. Install tall cabinets along one wall, use overhead lockers, and build drawers beneath the bed. A well-designed galley kitchen (8–12 linear feet) should include a two-burner stove, compact fridge, and sink without eating up your living room.
Material selection impacts both durability and weight. Plywood is the standard for cabinets and framing, but seal all edges with polyurethane or marine varnish to prevent moisture penetration. Avoid MDF (medium-density fiberboard) in humid environments: it swells and delaminates. Consider aluminum corner trim and stainless steel hardware to resist corrosion on the road.
Think multi-functional. A dinette with booth seating doubles as a workspace or guest bed. Fold-down tables save floor space. A pull-out pantry system uses awkward corners efficiently. These details separate a cramped van from a livable one. When browsing interior design ideas online, look for RV-specific examples rather than apartment layouts, the constraints are different.
Installing Water and Ventilation Systems
Your water system (fresh water, grey water, and black water tanks) is the backbone of onboard comfort. A 50-liter fresh water tank (about 13 gallons) supports a few days of showers and washing for one or two people. Mount it low (under the bed) for weight distribution. Insulate tanks in cold climates with foam or heat tape to prevent freezing.
Grey water (from sink and shower) drains to a separate 40–60 liter tank: don’t let it sit longer than a week in warm weather or mold grows fast. A simple drain system with 1-inch PVC runs from the sink and shower to the grey tank outlet, no fancy traps needed if you keep water moving.
For plumbing, use PEX tubing (flexible, freeze-resistant plastic) rather than copper or rigid plastic. Insulate exposed runs with foam pipe wrap, especially in unheated engine bays. A 12-volt water pump delivers pressure to a compact faucet: pair it with a small hot water heater (tankless propane or 12-volt electric) if you want showers that last longer than two minutes.
Ventilation ties directly to bathroom comfort and longevity. A powered roof vent (minimum 400 CFM airflow) runs 24/7 or on-demand to manage moisture. Add passive vents (small louvered ports) for passive air circulation. Moisture trapped inside causes mold on soft furnishings, rot in wood framing, and rust on metal. In wet climates, consider a small dehumidifier (battery-powered options exist) as insurance.
Finishing Touches: Luxury Materials and Aesthetics
The difference between a functional van and a luxury one comes down to finishes. Real wood (pine, ash, or hardwoods) looks and feels better than vinyl or laminate, though it requires sealing against moisture. Stain and varnish create warmth that’s impossible with plastic.
Floor materials take abuse: use marine-grade plywood with waterproof sealant or vinyl plank flooring (SPC or WPC, water-resistant engineered wood). Add a soft rug in the bedroom for comfort underfoot. Upholstery should be performance fabric (solution-dyed polyester or microsuede) that resists staining and mildew, cheap fabric deteriorates fast in a damp mobile environment.
Lighting sets the mood and functionality. LED strip lights along cabinets and under the bed provide task and ambient lighting. Dimmable controls make a big difference in cramped quarters. A single overhead light feels institutional: layer lights (strips, sconces, and a reading lamp) create a livable space.
Color and texture matter psychologically. Light colors (white, pale grey, soft wood tones) make compact spaces feel larger. Dark woods or deep blues create coziness if you prefer it, but test your scheme in person before committing, a color that looks great in a showroom photo can feel claustrophobic in a 6-foot-wide sleeping berth. Projects of this scale benefit from research on platforms like Remodelista, which curates practical design inspiration and product recommendations. And if you’re drawn to the lifestyle aspect, Apartment Therapy covers small-space living extensively.
Final touches: soft furnishings (quality bedding, throw pillows), plants (real or high-quality fakes), and personal décor that reflect your style. A luxury Sprinter van should feel like home, not a camping tent on wheels.